 173
173
To create a new workflow template, you must have access to the “Configure Templates” under the Work Orders menu as shown below. If you don’t see the option, please contact your system administrator to set the “Manage Workflow Template” in your user settings to “Yes”.

Select “Rich Text Templates” under Workflow from the left navigation bar. This will bring you into the workflow module and open the Manage Custom Template window.

Create a New Workflow Custom Template
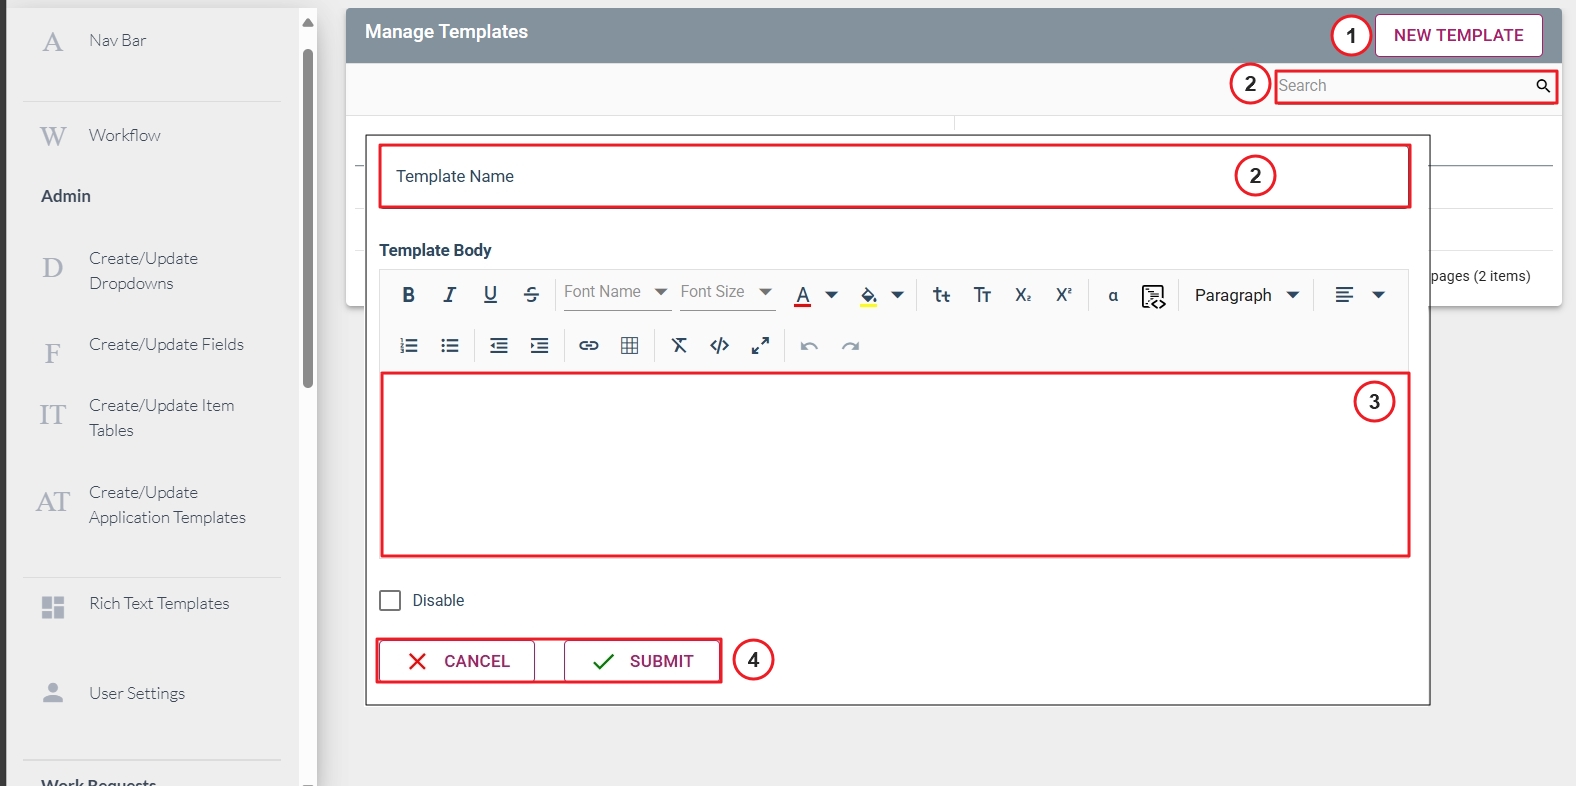
- In the Manage Custom Templates window, press the “NEW CUSTOM TEMPLATE” button at the top right corner. This will open a blank editing window.
- Enter the name of the new template in the “Custom Template Name” field.
It is recommended to search the name of the custom template using the Search function, prior to creating and saving, to ensure uniqueness (see note below).
- Add your template content into the Template Rich text editor field.
- When you finish, press “Submit” to save your changes. If you want to discard all changes, press “CANCEL”.

Note: Template names are not required to be unique. However, it is better to run a search before creating the new one to ensure uniqueness. This will help to avoid any confusion.
Editing an Existing Custom Template
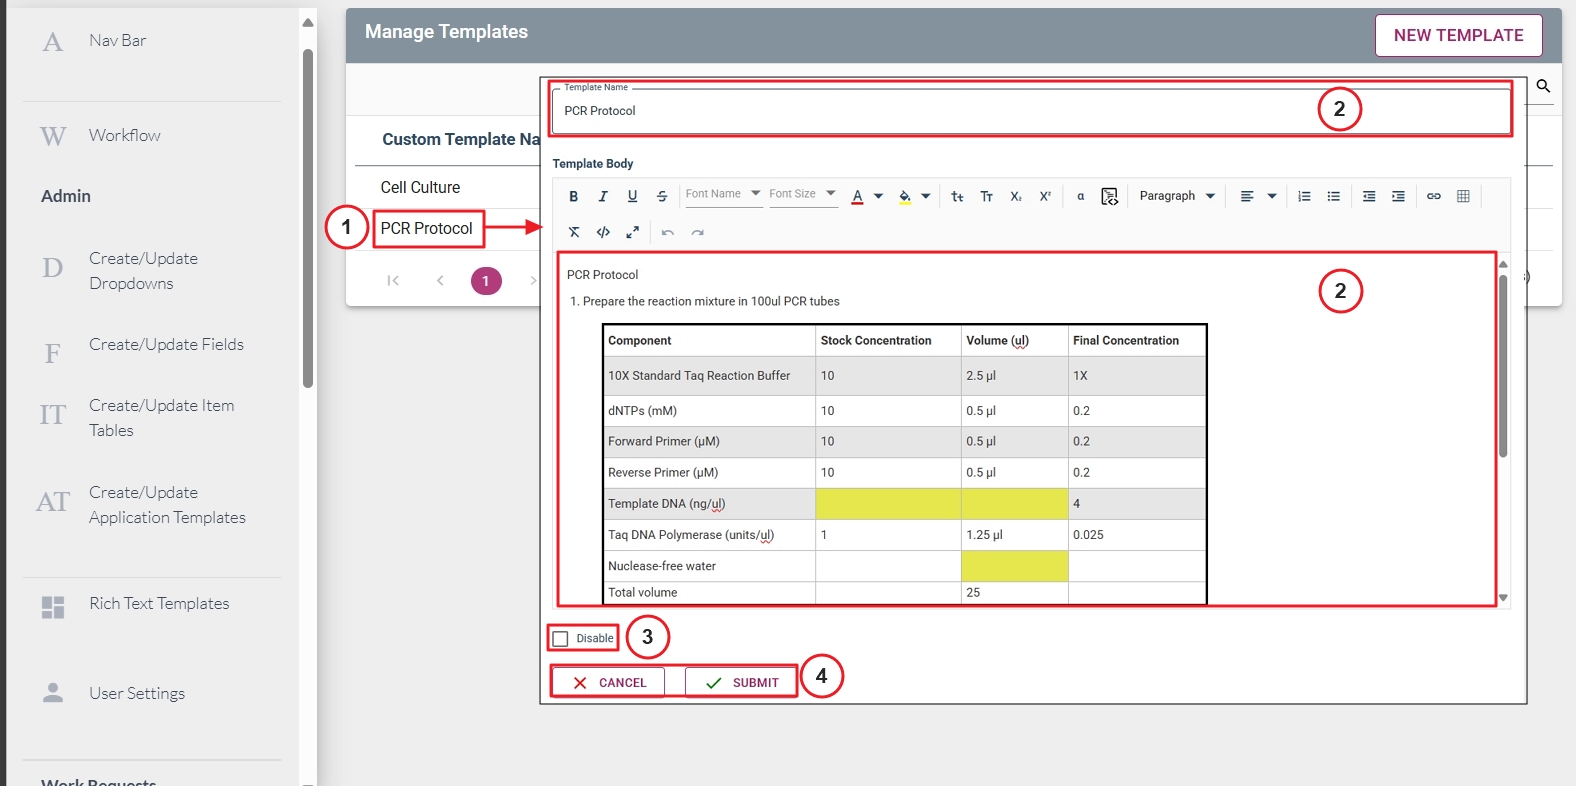
- In the Manage Custom Template window, click the custom template you want to edit; this will open the editing window.
- Make any necessary changes you want. All fields can be edited.
- If you don’t want the custom template to be displayed, you can disable the template by checking the box before “Disabled”.
- When you finish, press “Submit” to save your changes. If you don’t want to make any changes, press “CANCEL” to exit without saving.

Note: Please see the Add Custom Templates to Custom Experiment Configuration User Guide for information on adding Custom Templates to Custom Experiment Fields.


