Sharing a Project

Aug 28, 2025
 2118
2118
The owner of the project and system administrators can share it with other users and groups.
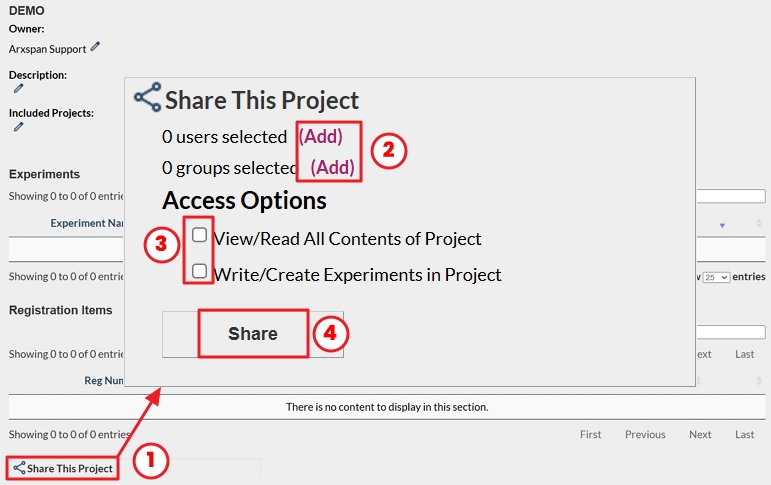
- Click the “Share this project” icon at the bottom of the project page. This will open the sharing dialog box.
- Select the groups or individuals you want to share the project with.
- You can select multiple recipients at once, but they will all receive the same level of access.
- If you need to assign different access levels (e.g., one group with write access and another with both view and write access), it’s recommended to share with them separately.
- Choose the appropriate access level:
- View/Read access allows users to see the project content but not add to it.
- Write/Create access allows users to add content but not view content added by others.
- To allow a user to both view and add content, both options must be selected.
- Click “Share” to send invitations to the selected recipients.
- They will need to accept the share invitation before they can view or contribute to the project.